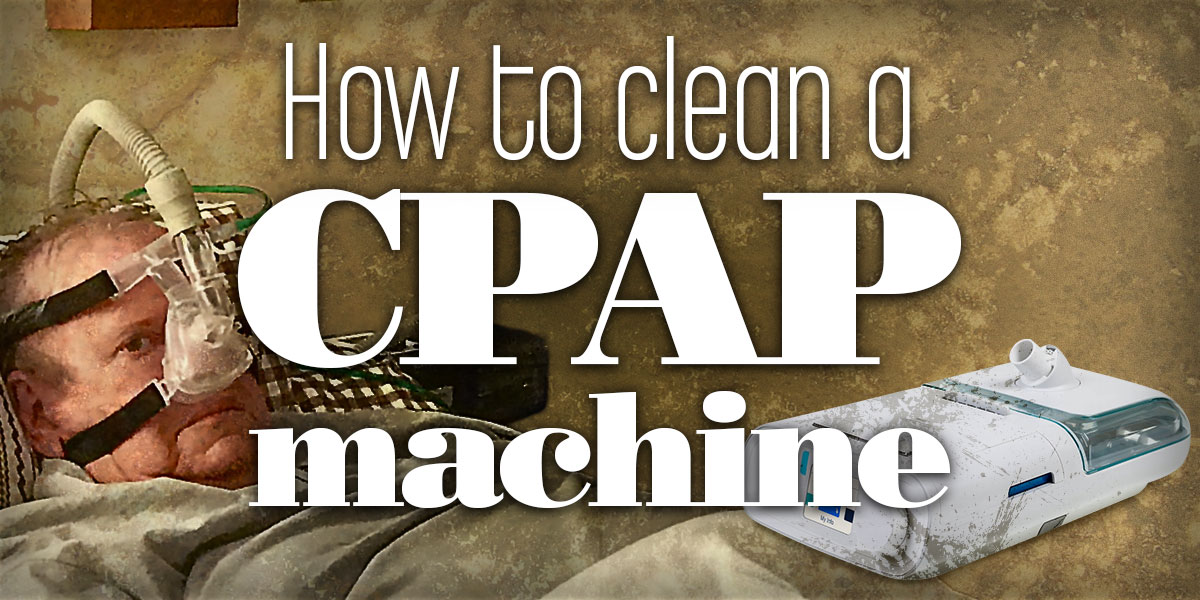
The moment you begin using a CPAP Machine (Continuous Positive Airway Pressure), there’s often a lot of information you need to take in. And during this time, a lot of information on your diagnosis and use of equipment could get you confused.
What is a CPAP machine?
One of the most important factors in maintaining your CPAP machine is taking good care of the equipment.
Your life is a priority; therefore, to enjoy successful CPAP therapy, users need to commit to regular cleaning and maintaining this equipment. Have you been taking good care of your CPAP machine? If not, you don’t need to panic. Taking care of this device is fairly easy, and does not consume a lot of time. Making a few adjustments to your morning routine will leave your CPAP machine working with a 100% efficiency.
Why is maintaining your CPAP Machine Important?
Picture this, when using this equipment, you are taking in air that has been circulated through a machine. This air is processed, humidified and filtered, meaning, the highest level of hygiene needs to be considered to keep you 100% safe. Cleaning your CPAP machine will help you avoid:
- Allergy symptoms
- Bacteria exposure
- Musty, foul odor
- Mold exposure
- Equipment failure and breakdown
- Voiding machine warranty
- Exposure to pneumonia or sinus
- Mineralization within the CPAP machine
By now, you understand the importance of keeping your CPAP machine clean and in good working order, but how should it be done? Don’t panic; while you don’t need a certificate to keep your CPAP machine clean, it requires a little expense.
How Often Should I Clean my CPAP Machine?
Once you get your CPAP machine, it should come with specific instructions for care, but there are still some basic tools and techniques used that cut across most models. Your physician may also recommend a routine cleaning schedule for your machine, including daily cleaning of the tubing, mask, and water chamber. While this might seem overly excessive, the risk of any sort of infection through contamination is extremely low. However, to be on the safe side, it is recommended that your machine is cleaned at least once every week. It’s also recommended that you do not share this machine with anyone.
What do I need to clean my CPAP machine?
- CPAP Machine including tubing, mask, headgear and humidifier water chamber.
- Warm water
- Soft cloth
- Towel
- Sink or basin
- Dish soap
- Cleaning your CPAP Machine
Step one: Disassembly of CPAP Machine
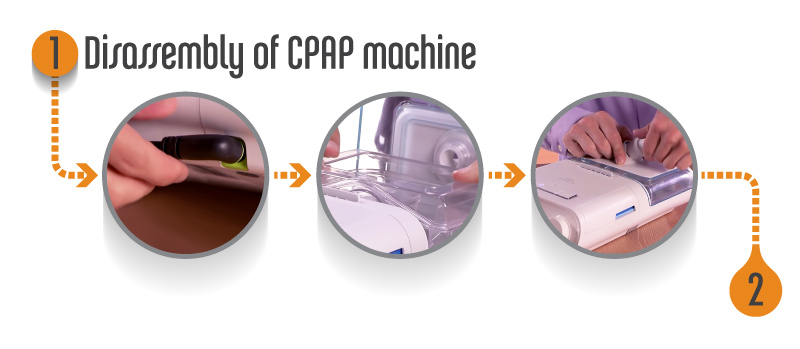
Before you begin cleaning anything, the first thing you need to do is unplug your CPAP machine from the mains. This is to ensure there is no risk of electrical shock. Detach your mask from the tubing. In case your CPAP mask comes with a headgear, remove it. Separate any other pieces that can easily be reattached. Separate the tubing from any connectors from the CPAP machine or the humidifier output in case it connects directly. Remember, newer, CPAP machines come with water chambers that can not be disassembled into several parts.
Step Two
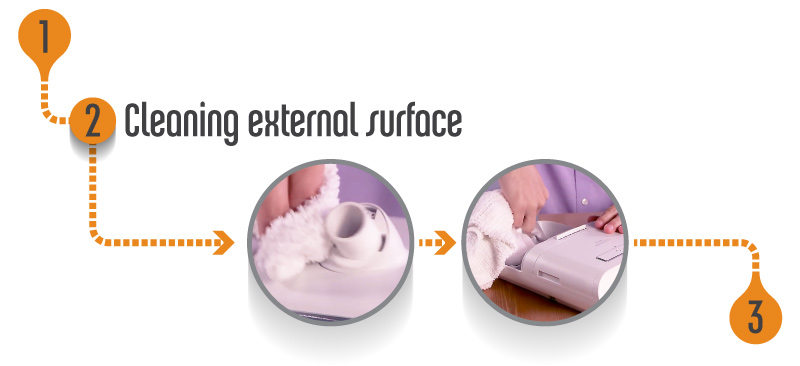
Dip the soft cloth into warm water and in a gentle motion, wipe the external surface of your CPAP equipment to get rid of the dust. Ensure that the machine is completely unplugged from its power source to prevent the risk of getting electrocuted.
Step Three
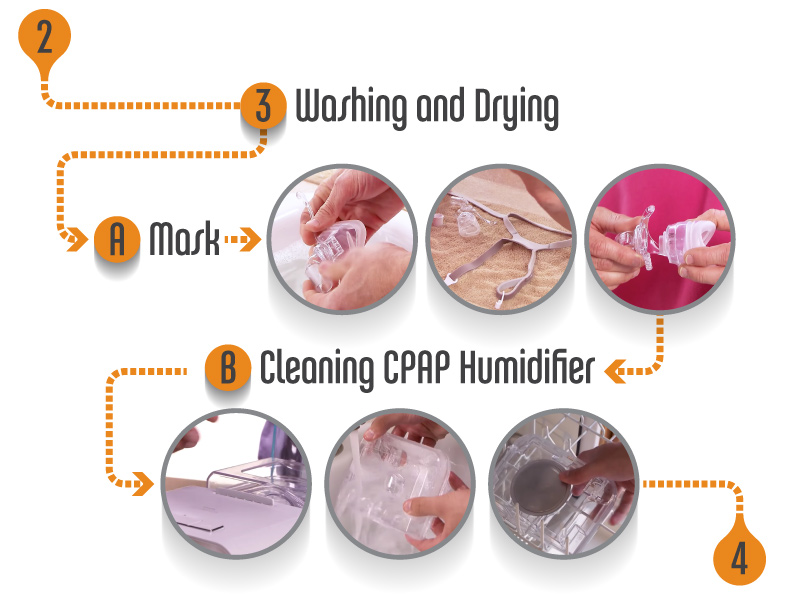
With your basin or sink, add warm water and mix it with dish soap. If you are going to use antibacterial soap, make sure it has mild antibacterial content. You could also use vinegar, however, make sure you mix it in a 1:3 ratio. Next, dip your headgear, mask, tubing, and any other connectors into the warm soap and water mixture. Let them soak in for a short period of about 30 minutes.
Alternatively, you could also wipe out your mask with warm water and a soft cloth, and swish the soapy or vinegar mixture through the tubing. After everything is clean, air dry all the detached CPAP components on a dry towel or by hanging.
Replacing and Cleaning your CPAP Mask
Depending on your CPAP mask, its cushions could be made of non-irritating material or silicone. And, while silicone is a relatively comfortable material for use on masks, it generally doesn’t have a long lifespan. Without proper care, your silicone cushioning will begin to breakdown. It is due to this reason that your CPAP mask needs to be well maintained. Here are a few tips on how to keep it working efficiently.
- Wash your mask daily with warm water and dish soap.
- After washing with warm soapy water, rinse with water and air dry on a dry towel or hang in direct sunlight.
- Before getting to sleep, wash your face thoroughly and avoid using any cosmetic products while having the gas mask on. Using facial oils could negatively affect the gas mask, accelerating wear, and tear.
- Soak the mask at least once a week in vinegar and water solution (1:3) before rinsing with warm water and air drying. Do not place the gas mask in a dry or washing machine.
- When it comes to replacement, check with your sleep specialist or equipment manufacturer for correct timelines.
Ideally, these items need to be cleaned daily. However, you could make a personal effort to clean it weekly. Your CPAP humidity chamber needs to be cleaned with hot water, and mild soap then left to air dry.
Cleaning CPAP Humidifier
Most CPAP equipments come with a heated humidifier processing system that helps users cut down on dry mouth as well as keeping their nasal tubing from getting inflamed or irritated due to drying. It is, therefore, only fair to keep the humidifier clean to prevent any buildup of bacteria as well as calcification.
- First, remove the chamber from the humidifier to prevent water from getting into your CPAP machine.
- Gently open the chamber and clean with warm soapy water
- Rinse the chamber thoroughly with water and allow it to air dry on a clean cloth, and not in direct sunlight.
- After you have cleaned the chamber add distilled water (avoid using tap water since it may contain minerals that could damage the equipment’s components).
- Soak the humidifier at least once a week in vinegar and water solution 1:3 ratio for about 30 minutes before rinsing with distilled water.
Your humidifier chamber needs to be replaced every six months.
Remember, you can only use distilled water when cleaning the humidifier; this is to remove the risk of illnesses and infection caused by mineral buildup in your equipment.
Step Four
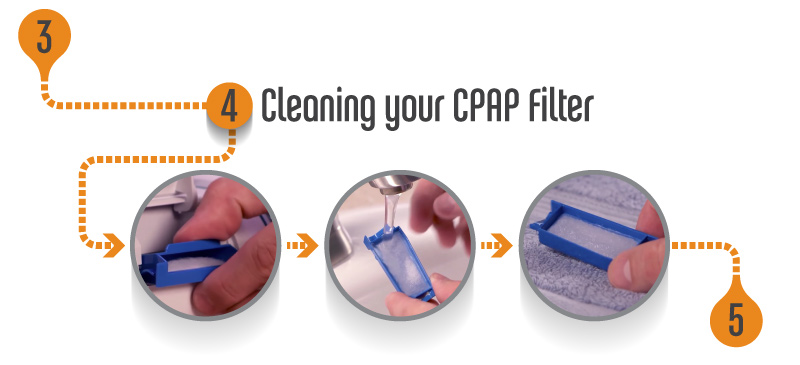
In case your humidifier was issued with a filter, its vital that you check your owner’s manual for direction on how to clean it. Depending on the manufacturer, your filter can be rinsed; however, there are some models that need the filters replaced after prolonged use. While replacement largely depends on the environment you are in; most manufacturers recommended replacing the filters monthly.
Cleaning your CPAP Filter
If you are using a modern CPAP machine, it comes with a filter. The filter is normally located at the back of the CPAP machine, and this is where the device is drawing air from the room, compressing it to your preset pressure settings. Nearly all CPAP machines have disposable filters, with some having an extra grey filter that is non-disposable. The following are cleaning tips for your filter:
- In case your CPAP machine comes with a grey non-disposable filter, make sure that you clean it at least once in a week. You may need to clean it more frequently, especially if you have pets in your household or live in a dusty environment.
- When it comes to cleaning grey filters, use warm water, and allow them to dry before fitting them back into the equipment.
- After prolonged usage, around six months, your grey filter will begin to wear out, at this point, you need to have it replaced.
- For your white filters, have them replaced monthly or more frequently, depending on how worn they look.
Remember, your CPAP machine itself doesn’t need to be cleaned; however, you might want to clean out the outer surface to get rid of the dust. Use a slightly damp cloth for this process.
Step Five
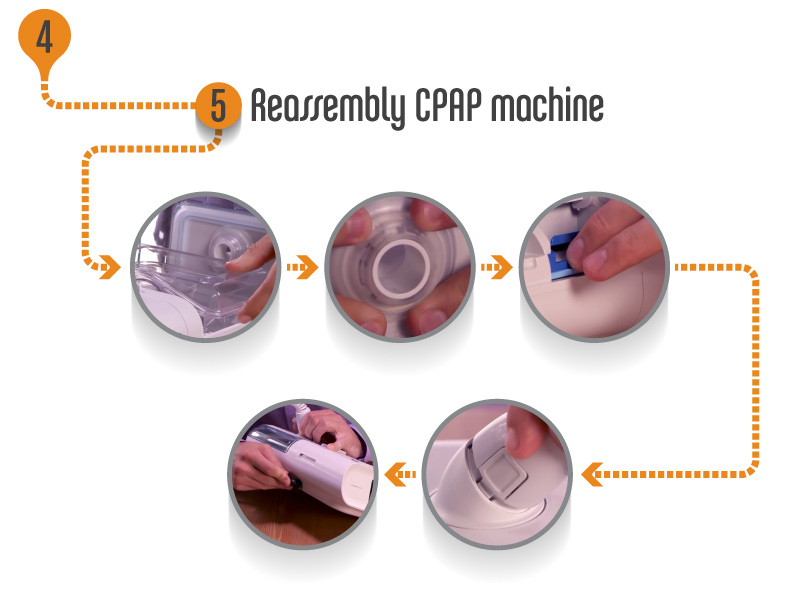
After you are satisfied that all the components of your CPAP machine are dry, assemble all the parts. Attach your headgear to your mask, hook your mask back onto the tubbing, and any other connected or to the CPAP machine. Check that all the components have been connected correctly and fit tight, then connect the machine back to the mains and turn on the power briefly. Listen for foreign leaks and adjust accordingly.
Monitor your machine over the next several days. If you notice that your sleep apnea symptoms have resurfaced or that your equipment might not be working as it should check with your sleep specialist or equipment provider for a comprehensive maintenance service.
Are CPAP sanitizer products advisable?
While these products have been heavily advertised and even recommended by some health institutions, it is not necessary to use these sanitizers to keep your machine clean and well maintained. Some of these sanitizers use ozone or ultraviolet light to sanitize your equipment, which is expensive and only add a little effect beyond the cleaning instructions already provided here.
With these simple to follow instructions, your CPAP machine will give you a better CPAP therapy experience and serve you for a much longer time. Remember to always contact your sleep specialist or CPAP equipment manufacturer in case you experience any difficulties using your machine.

