We are massive fans of weighted blankets (and if you haven’t seen it already, you should check out our FAQ on the subject). But even we take issue with the pricing from time to time. Depending on where you shop and what materials are used, you could be looking at spending several hundred dollars on a single blanket. That’s why we’re also big advocates of the DIY weighted blanket movement.
Why go the DIY weighted blanket route? Besides saving you a large sum of money, making a weighted blanket is very easy to make, even if you aren’t the sewing and crafting type. It’s also very inexpensive to assemble everything you need to make your blanket, giving you all the benefits of a professionally manufactured weighted blanket without investing as nearly as much money in it.
In this article, we’re going to look at a handful of simple ways of how to make a weighted blanket with removable weights. Each method is so easy that you most likely have everything you need for your DIY weighted blanket kit already in your house. You’ll need to purchase the weighted blanket pellets that give the blanket its uniform weight and heft (we’re willing to be most people don’t have those lying around the homestead). But otherwise, you’ve probably got a head start gathering the essential items.
Method One – The “Traditional” DIY Weighted Blanket
We’ve dubbed this one traditional, but that just really means it’s the common sewing option. Though there isn’t much sewing involved, the skills needed require some practice to ensure your blanket comes out correctly. This is especially true with the weighted pellets, where you to get as close to even weight distribution as possible. If you don’t have much experience with sewing and don’t want to risk it, skip to the next method.
Some people prefer this option because they feel the sewing gives them a greater degree of control over how the final product will turn out. Others simply enjoy sewing. Regardless, know upfront that of the methods we’re going over in this piece, this one will require you to spend more of your time. With that said, let’s begin.
What You Need:
Fabric of your choice
Go with whatever fabric you’d like so long as it’s strong enough to handle the weight of the pellets. You’ll need fabric for both sides of the blanket and can mix and match if you’d like to. Also, consider the feel of the fabric if it’s being made for someone with textural sensitivities. As for measurements, you’ll want the blanket to be a few inches longer than you are tall (width doesn’t matter so much as long as the blanket entirely covers you from side to side).
Weighted pellets
Technically, you can use a variety of beds and other objects as fillers, but we recommend plastic pellets like Poly-Fil because they’re washable. Prices can vary depending on where you shop, so be sure to search online as well as in your local craft shops.
Small scale
For the weighted pellets.
Yardstick
Or fabric measuring tape.
A marker
You’ll need to mark certain sections of the fabric as you go along.
Pins
To hold it all together before the final sew.
Sewing machine
You can sew by hand if you feel confident, but you’ll have a much easier time using a machine when doing the edge work.
Strong thread
Emphasis on strong. Again, it needs to be able to hold against the weight.
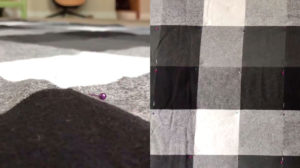
Step 1 – After you’ve measured and cut the fabric you’d like to use, pre-wash those pieces in cold water and dry on low heat. This will preemptively shrink the fabric so the completed blanket won’t be damaged the first time you wash it. Use an iron or spray on any wrinkles that result from this if they concern you.
Once that’s done, take your two pieces and lay them out face to face (with what you want to be the blanket’s insides facing outward). Make sure they overlap exactly and use pins along the edges to keep them in place. Sew the two long edges and one of the short edges closed so that there are no gaps.
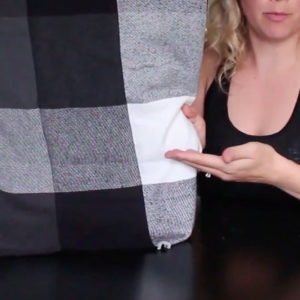
Step 2 – Pull the fabric right-side out. Inspect to make sure you didn’t leave any holes in your seams, and if you didn’t, grab your marker and yardstick. Measure one to two inches from all edges and draw complete lines from each of them to draw a large rectangle within the fabric (this only needs to be done once). With that complete, draw as many three to five-inch squares as you can in horizontal rows inside that rectangle. It’s okay if your measurements vary so long as the squares are all the same size and don’t leave gaps (they should be touching).
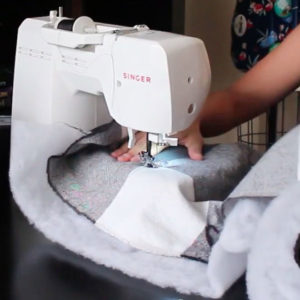
Step 3 – First, sew along the outer edges of the rectangle, except for the top. Then sew along the vertical lines formed by all the marked squares, creating columns.
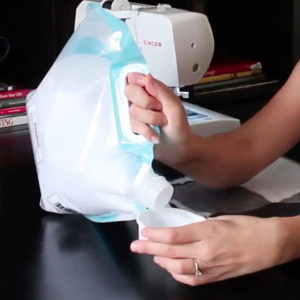
Step 4 – A weighted blanket should only be about 10% of the user’s body weight, so we need to do a little math here. Find ten percent of your weight, convert it into ounces, then divide that by the number of squares you’ve drawn. Take the final amount and pour pellets equal to that weight into each column.
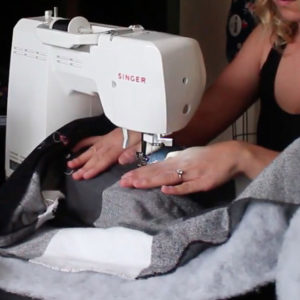
Step 5 – Sew across the horizontal line directly above the pellets you just added. Make sure it’s sewn tightly so that pellets don’t escape the square they are in.
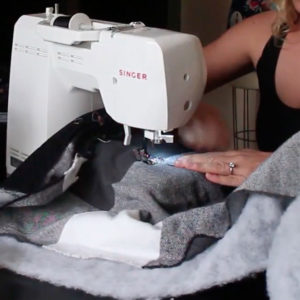
Step 6 – Repeat steps 4 and 5 until you’ve filled and sewn every square. During this process, you’ll want to make sure the pellets are away from where you’re sewing. You can do this by standing and holding the blanket up.
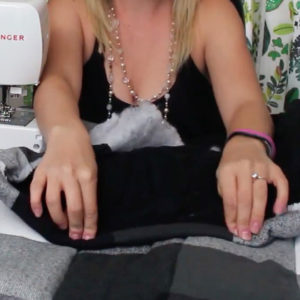
Step 7 – Finally, sew the top opening closed.
That’s it! If you’ve done this correctly, each square will have the same weight and pellets won’t travel between squares.
Method Two: The No Sew Blanket
If you aren’t so handy with a needle, this is the method for you. The weighted interior is made separately from the interior but isn’t removable unless you want to spend some time untying knots. Note that due to how the weighted interior is made, this blanket isn’t machine washable.
What You Need:
Fabric of your choice
You’ll need two pieces. See the first method on how to measure the pieces.
Weighted pellets
Small scale
-
- Plastic sandwich bags – These will be used to make the pockets inside the blanket
- Duct tape – To help form the interior.
Scissors
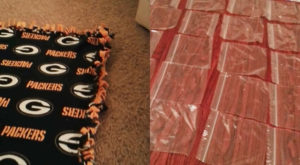
Step 1 – After you’ve measured and cut the two pieces of fabric you’ll use for the exterior, take one piece and begin arranging empty sandwich bags flat on it in horizontal rows. You can use as many as you like so long as the bags are evenly spaced out and you leave four inches along all sides of the fabric.
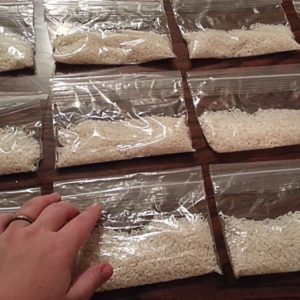
Step 2 – Fill the bags you’ve laid out with weighted pellets. See Step 4 of the first method to determine how much you will need. Seal each bag after you’ve filled it and place it back where it was.
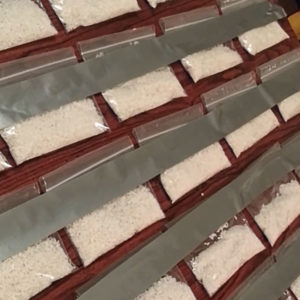
Step 3 – Next to the fabric (but not touching), layout a number of tape strips equal to the number of bag rows you have with the adhesive side up. Try to make the strips just long enough to cover the length of the rows and not the length of the fabric. Place them so that they are in line with the tops of the bags and equally spaced. Place vertical strips underneath the far side of the strips, also adhesive side-up, to secure them all in place.
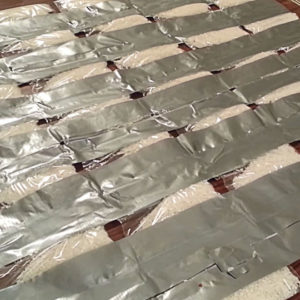
Step 4 – One at a time, pick up a bag, fold its top back, and stick it to the tape. Make sure the pellets aren’t caught in the fold. Place each bag on the tape relative to where it was on the fabric. Do this for every bag.
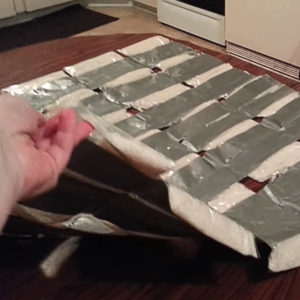
Step 5 – With all of the bags adhered, place more tape over the previous pieces sticky side down. This also means you’ll be covering the tops of the bags an additional time. If done correctly, no more adhesive will be exposed and you can move the entire piece without the bags sliding out of place. This is the interior of the blanket.
As an optional step, you use more tape to fill the empty space between bags. This will add just a little more weight and can help the blanket feel more full.
Step 6 – Take both pieces of fabric and place them one on top of the other. Make sure the edges line up with each other as closely as possible.
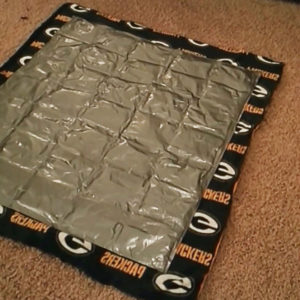
Step 7 – Cut a three-inch by three-inch square out of each corner. Then, go along the edges and cut both pieces together to form the fringe. Each cut should be three inches long and half an inch apart.
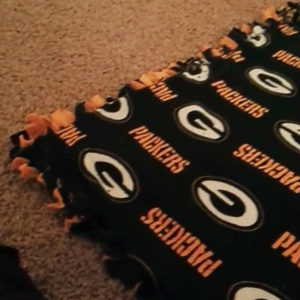
Step 8 – Pick two adjacent sides and tie the top and bottom pieces together with each strip of the fringe. Try to get the knots as close to the rest of the fabric as possible. This creates the exterior. Make sure no part of the fringe is untied.
Step 9 – Take the interior, place it in the exterior, and tie the remaining edges together. There’s no need to secure the interior with additional tape. It won’t have much room to move, and if you tied the knots close to the fabric they will help to secure it.
Method Three – Pillow Case Weighted Blanket
This uses a pillowcase as the exterior and interior, using some of the steps from method one to do so. Because of the small size, it’s not ideal for sleeping but works as a therapy tool or lap blanket. The design is unique in that you can remove the weighted interior and wash the exterior, making it easy to keep it clean. Just make sure you don’t use a thin pillowcase for the exterior.
What You Need:
-
- Two pillowcases – They should be the same size.
- Velcro – This is to seal the exterior
- Sewing machine
- Thread
- Scissors
- Weighted pellets
- Small scale
- A marker
- A ruler
Step 1 – Turn one of the pillowcases inside out. Sew the Velcro along with the opening, with opposite sides of the Velcro on opposite sides of the opening. When you turn the pillowcase outside in the Velcro should seal the opening without being loose.
Step 2 – Figure out how many pockets you want your blanket to have. Then, take your second pillowcase and sew equally-sized horizontal columns.
Step 3 – Draw horizontal lines across the pillowcase. Your goal is to draw the pockets you want. They should be equally sized and each horizontal row needs the same number of drawn squares.
Step 4 – See Step 4 of the first method to determine how much weight you’ll need in weighted pellets. Take that weight and divide it by the number of pockets you’ve drawn. Pour pellets equal to that weight into each column.
Step 5 – Sew across the horizontal line directly above the pellets you just added. Make sure it’s sewn tightly so that pellets don’t escape the square they are in.
Step 6 – Repeat steps 4 and 5 until you’ve filled and sewn every square. During this process, you’ll want to make sure the pellets are away from where you’re sewing. You can do this by standing and holding the blanket up.
Step 7 – Sew the top of the pillowcase closed. Again, make sure this is tight. The interior is complete.
Step 8 – Insert the interior into the exterior pillowcase and seal it closed with the Velcro strips. You may need to fold the edges of the interior over slightly so that it will fit. You’re finished.
And there you have it! Three basic methods for making your weighted blanket. Pick whichever one suits your skill level or look at the fundamentals of each one and create your own process.


